It's a 4-week course being offered at a local craft store. Each class lasts two hours. During the first week's class we didn't actually do any decorating but just learned about how to make the icing, how to make it in different consistencies that would be useful for different types of decorations, how to level a cake, and we got some guidance on what supplies to buy for class.
For the second class, we had to bring an 8-inch cake that had been iced with a base coat. In class we would practice techniques for a few types of decorations, and then we would decorate the cake.
In the first class we learned a few tips for baking and prepping the cake that, as one girl in the class said, were "worth the price of admission alone." One tip was for greasing the pans: rather than spraying the pan with Pam, or messing with greasing and flouring the pan, we learned to make a "cake release": mix well equal parts of shortening, vegetable oil, and all-purpose flour and then brush this mixture all over the pan with a pastry brush. It worked really well and my cake came out of the pan with nothing sticking to it.
Another tip we learned was to ice the cake with a "crumb coat" first. This is a really thin layer of icing that traps in it any crumbs on the outside of the cake. You let it set up for about half an hour, and then when you put on the 'real' coat of icing you get a smoother finish. Here is a picture of my cake with the crumb coat on it:
 Now here's what I felt was the most useful tip I learned. After you put on the final coat of icing, here's how you can get a really smooth finish: wait about half an hour for the icing to set, and then place a piece of parchment paper on top of it. Rub your spatula on top of the paper to smooth out the icing. Here's a shot from before and after I did that:

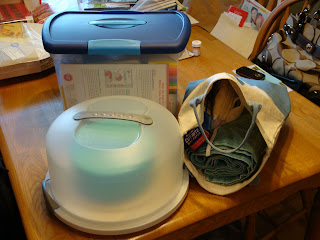
So once my cake was ready to go, I had to pack up all the supplies that were needed for the 2nd-week class. And it was a LOT of stuff. That is one minor complaint I had about this course. The course itself is not expensive, but you have to buy a lot of supplies. Here's a picture of everything loaded up and ready to go to class:
 In class we practiced making stars, curved lines, zigzag, dots, outlining, and writing. Then we used some of those techniques to decorate our cake. The sample cake in the book had a big ugly rainbow on it, but I decided to make a hot air balloon instead. Class was actually slightly stressful because we didn't have much time to finish everything, but I finished it when I got home.

So when it was time to try the cake I just cut out a piece that had my giant thumb gouge in it.

It was pretty good! I'm looking forward to doing the cake for week three, although it involves creepy clowns... stay tuned!


2 comments:
I can't wait. I have always wanted to try one of these courses too. I'm glad you are sharing.
You did a pretty impressive job! And I appreciate you sharing techniques!
Post a Comment